Basic HTML
Body
Body Text
Character Entitities
Elements
Fonts
Head
Headings
Horizontal Lines
Images
Image Formats
Image Links
Images & Text
Links
Lists
Meta tags
More Studies
Paragraphs
Tables
Table Example
Tags Explained
Test Yourself
Text Formats
Tips
Troubleshooting
|
Pictures liven up your web-page and make it more attractive. The disadvantage is that they can be slow to download. A page that takes forever to appear on your screen is annoying, and most web surfers will go and look for something better, they won't wait.
To avoid this problem follow the following simple rules:
- Reduce the size of your images, use Photoshop or PaintShopPro.
- Limit the number of pictures on your page to maximum 3 or 4.
- Best is to use small "thumbnails" with links to the larger version.
Of course these rules don't apply to special photo pages, in this case the viewer has already selected them for viewing and knows that a delay is to be expected.
- GIF
- Best used for small images, or text and line drawings- the extension is .gif - as in label.gif
- JPG
- Pronounced "jay-peg" is the most popular format for pictures and compresses to relatively small file size. Because of compression repeated editing and saving causes loss of defintion. The extension is .jpg - as in bird.jpg.
- PSD
- The Adobe PhotoShop format. There is no compression of data, therefore picture clarity is retained during manipulation, but the file size is very large and it is not normally used for Web pages. It is the preferred format for book illustrations. The extension is .psd - as in bird.psd.
- Other
- There are numerous other image formats used by various applications, such as .png, .wpg, etc. that are of little interest to web-page designers.
|

Paint Shop Pro.
Adobe PhotoShop
|
|
The basic image format is:
<img width="pxw" height="pxh" src="URL" alt="text" />
where "URL" is the the address of the location where the image is located (following the rules listed under link ; "pxw" and "pxh" are the width and height of the image in pixels; "text" is a very brief description of the image.
The dimensions are needed so that the Browser can reserve space for the image while is being downloaded into the page, this might take several seconds, but in the meantime the text of the page can be downloaded quickly. You can find the dimensions in PaintShopPro by clicking "View", then "Image Information", in Photoshop click "Image", then "Image Size".
"text" is needed in case the image cannot be found by the Browser, so that the reader has an idea what should have been in the reserved space. It also provides information in Browsers that have no graphical capability, like the old Lynx browser.
Here is a specific example:
<img width="100" height="50" src="designlogo1.gif" alt="Logo" />
The image will be aligned on the left of the space, unless we use the appropriate paragraph alignment attributes, see paragraph.
Frequently we wish to insert a picture into text. To do this we must add several more attributes. To place the picture on the left side and have text flow around it, we add the attribute align="left", or to place it on the right with attribute align="right". However we also need to provide some space around the picture to separate it from the text, we do this with the attributes hspace="5" vspace="5". Here is a complete example:
<p>Syrena Consulting offers web page design service
<img width="100" height="50" align="right" hspace="5" vspace="5" src="designlogo1.gif" alt="Logo" />blah blah blah and so on. </p>
Warning! Make sure you use the correct dimensions for width, height, otherwise the picture will be distorted.
If you use the attributes align="top" or align="bottom", a single line of text will be aligned with the top or bottom of the image, any remaining text will follow below the image.
<p><img width="100" height="50" align="top" hspace="5" vspace="5" src="designlogo1.gif" alt="Logo" />blah blah blah and so on. </p>
<p><img width="100" height="50" align="bottom" hspace="5" vspace="5" src="designlogo1.gif" alt="Logo" />blah blah blah and so on. </p>
Finally, if you want all the text to be completely clear of the image and appear below it, insert the following tag before the line of text:
<br clear="left" /> , thus:
<p><img width="100" height="50" hspace="5" vspace="5" src="designlogo1.gif" alt="Logo" /><br clear="left" /> blah blah blah and so on. </p>
If, as I suggested, you are making you own examples in your "test.html" file, you will not see the images, because they reside on my server. You may copy them to your computer, if you wish. This is how:
Right click on the image, then in the box that appears, left click on "Save Picture as" ("Save Image as" in Netscape). Make sure you save to the same folder where your "test.html" is located. It will be saved with correct name and format.
|
Examples of Images

<p align="center">
Syrena Consulting offers web page design service blah blah blah and so on and so on and so on and so on and so on and so on and .....
blah blah and so on....
blah blah and so on....
blah blah and so on....
|
|
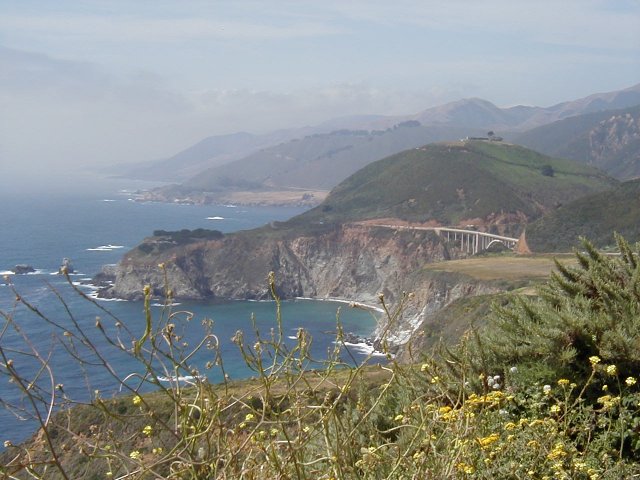
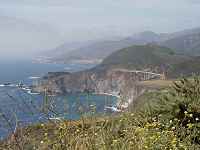
Linking from "thumbnail" images to the full size image, even on a different site, is the main reason for linking images. This is accomplished by combining linking with image elements. The following example shows how this is done:
<p><a href="bcbphotos/306Bigsur.jpg">
<img width="200" height="150" align="right" hspace="5" vspace="5" src="bcbphotos/306Bigsurm.jpg" alt="Big Sur view" /></a> This is a view in the Big Sur area of California, taken from the scenic coastal highway..</p>
We recognize that the first line is the main part of the link element, which specifies the item to which the link is made, namely the large picture (in this example it is located in the folder "bcbphotos" which is a subfolder of the current folder where this file resides).
The item specified after the tag <img specifies the image that we actually see in this file, which is a "thumbnail" of the larger picture.
|
This is how this code is interpreted by your Browser:
Click on the picture with colored border to se the full size picture
 This is a view in the Big Sur area of California, , taken from the scenic coastal highway... This is a view in the Big Sur area of California, , taken from the scenic coastal highway...
|